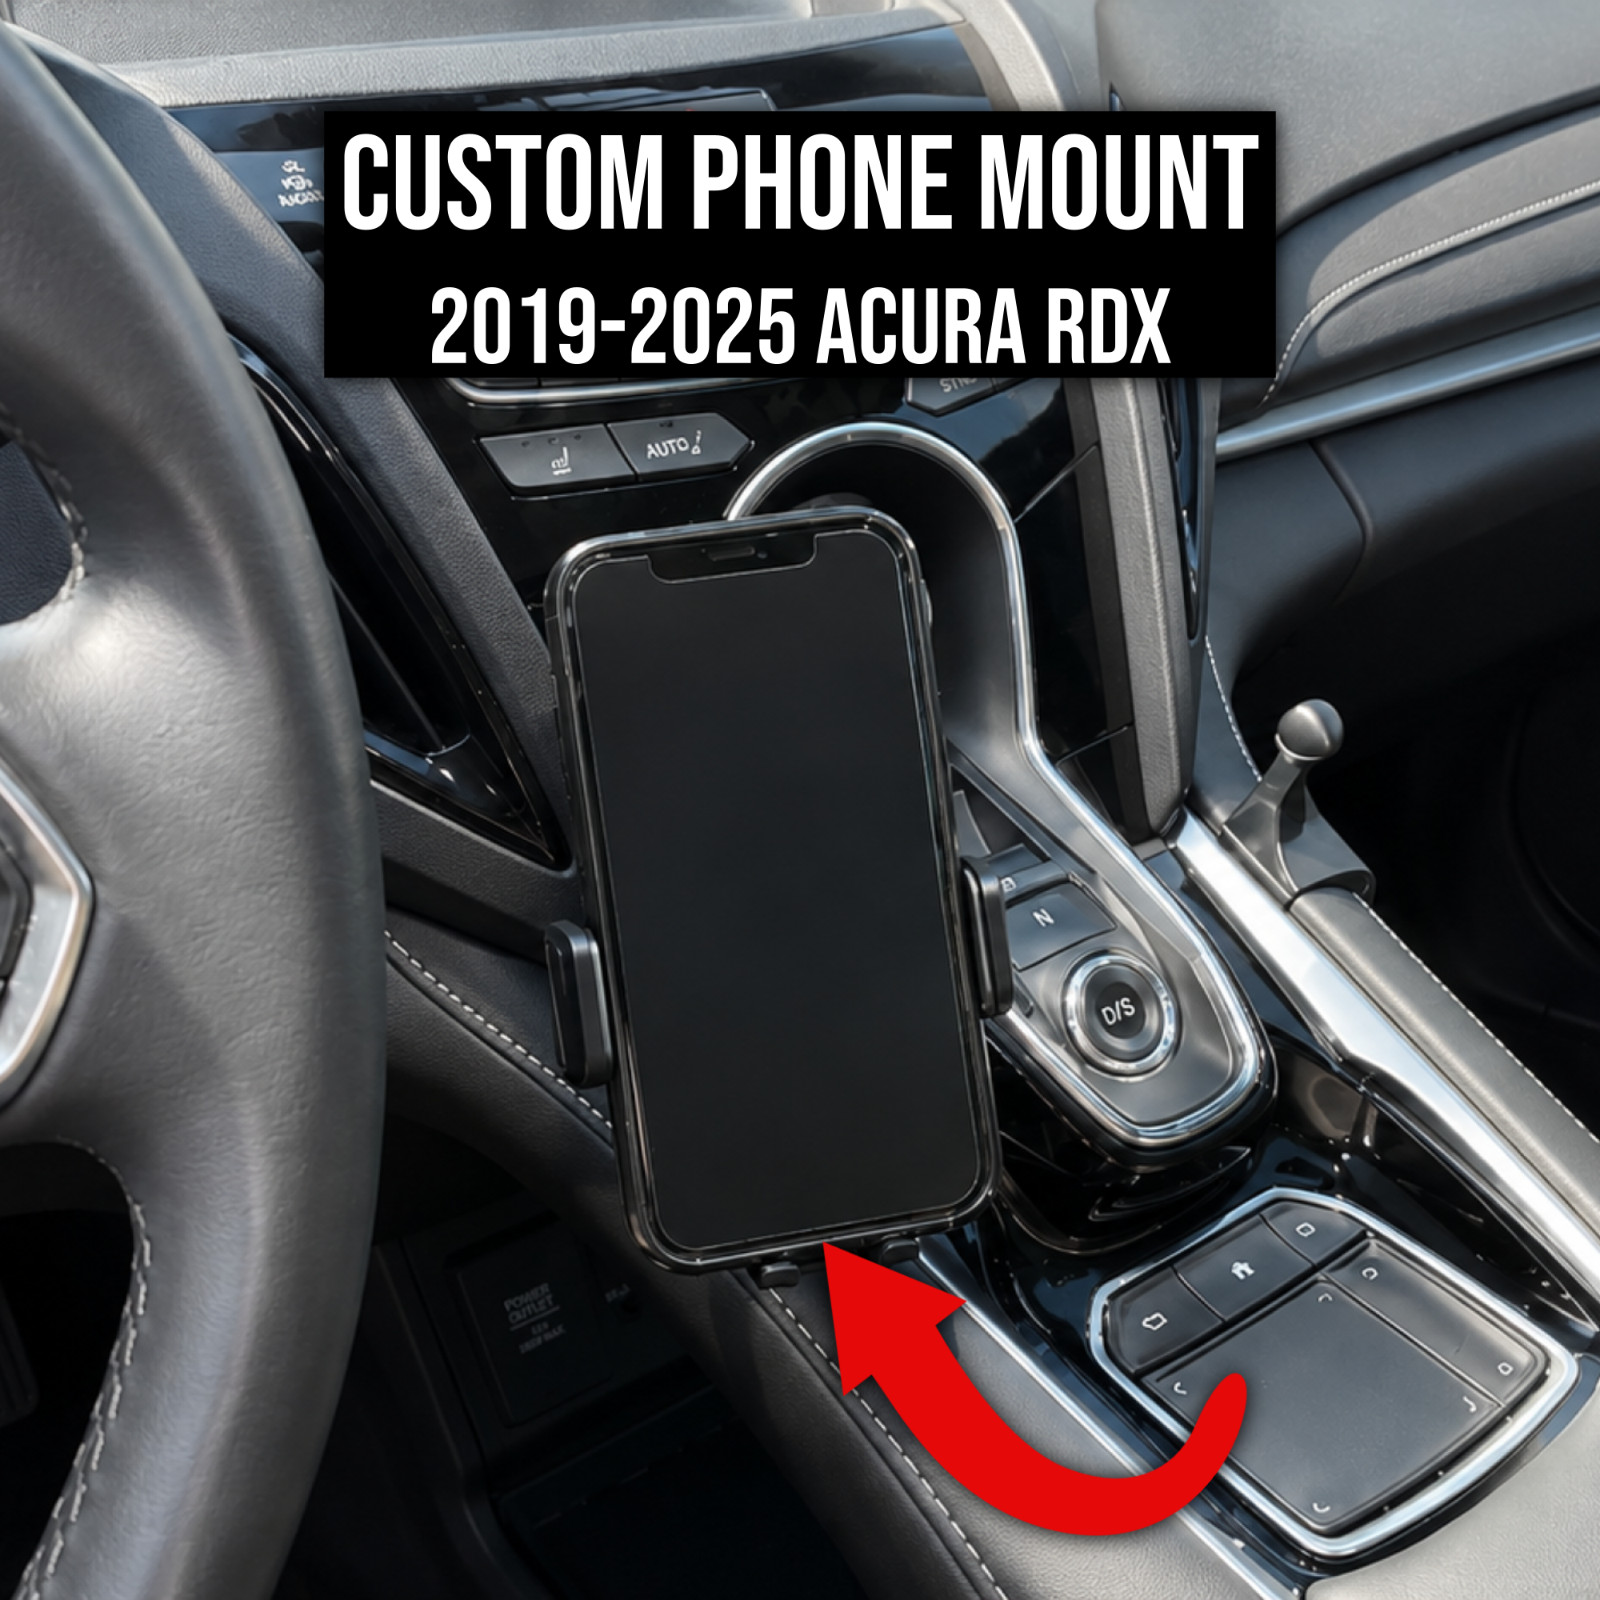
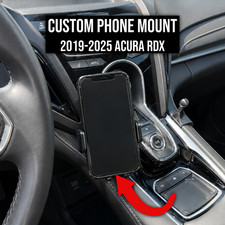
This is a custom-fit 3D-printed phone mount that securely attaches around the leather center console trim panels in all 2019 to 2025 Acura RDX models. It features a conformal 3D-printed adapter which is designed to be ‘wedged’ into the small gaps between the hard plastic and leather trim pieces, allowing for a secure and stable fit while being easily removable. The wedge-fit adapter has a 17MM-diameter pivot ball end for easy attachment to most automotive phone holders, 4 styles of which can be bundled with the adapter for a complete solution. This design eliminates the guesswork of universal mounts that may not properly fit your vehicle, offering a clean, adjustable solution that installs in seconds.
Compatibility:• 2019-2025 Acura RDX• Does NOT fit any other RDX years or other Acura models (MDX, etc.)
Phone Mount Position (Side of Console):• The wedge adapter can be printed in 2 different orientations depending on the side of the center console you’d like it to mount to.• Choose ‘Left Side’ if you’d like the adapter / mount assembly to be on the left side of the console, closer to you.• Choose ‘Right Side’ if you’d like the adapter / mount assembly to be on the right side of the console, farther from but still angled towards you.
Attachment Options:• 3D-printed adapter ONLY, you supply your own 17MM-compatible phone mount• Adapter with full-body plastic \'standard\' mount• Adapter with basic magnetic mount and adhesive metal sheets (NOT MagSafe compatible)• Adapter with MagSafe-compatible ring mount (ONLY compatible with MagSafe devices / cases)• Adapter with MagSafe charger mount (ONLY compatible with MagSafe devices / cases, supports 15W charging, plugs into USB-A port)** The exact appearance and cable color of the optional MagSafe-compatible wireless charger may vary between the 3 styles pictured in the listing depending on availability. All charger styles have been tested to reliably fit and work with this mount’s 17MM pivot ball attachment. **• Keep in mind that the MagSafe ring and charger mount styles will only work with phones/cases that are MagSafe compatible – if your device / case does not allow for this, then only the standard plastic and basic magnetic mounts will work.• The basic magnetic mount will NOT support larger phones (> 200g) or thicker cases (> 1mm) due to limitations in strength of the included sheets.• If you decide to order any of the 4 styles of mounts with the printed adapter, please be aware of their compatibility and strength, and be sure to test the assembled mount can securely hold your phone BEFORE driving with it. These are 3rd-party components that are handpicked, tested, and assembled with our handmade parts, but they are not manufactured by us. We will NOT be responsible for any damages resulting from their installation, use, or misuse.
Installation Guide:• Take the 3D-printed adapter piece and, ensuring the pivot ball end is facing towards you, wedge the top ‘prong’ into the small gap between the leather and hard plastic center console trim pieces. The thinnest section of the leather trim where the adapter mounts to is located is just in line with the neutral ‘N’ button on the shifter.• With the top prong wedged into the upper gap, pivot the mount downwards and bring the bottom prong towards the lower gap in the trim, and push it into place. Both the adapter and the leather trim will flex slightly as the adapter wedges into the gap.• You may need to apply light additional pressure on the outer faces of the adapter where the prongs are and/or on the surrounding leather trim to make sure the adapter is fully wedged into the gaps. You can then lightly shake and pull on the adapter to make sure it is secure.• Install the phone mount onto the pivot ball end of the adapter by unscrewing the fastening nut from the back of the mount, slipping the nut over the round ball end of the adapter, pressing the mount on to the ball, and then tightening the nut down on the back of the mount by rotating it counterclockwise (since the mount is facing towards you).• IMPORTANT: ensure you properly loosen the fastening nut on the phone mount BEFORE attempting to rotate or adjust it. If the nut is still tightly attached and you attempt to rotate it, you will risk bending or breaking the 3D-printed adapter piece. Simply unscrew the nut to rotate and adjust, then re-tighten it when you have the mount in the most comfortable spot. I will NOT provide free replacements for broken adapters due to improper installation / adjustment of the phone mount.• You can remove the mount assembly at any time by inversing the steps outlined above; first, remove the phone mount from the ball end by unscrewing the nut on the back and then popping the holder off. The adapter is then removed by first lightly pulling out the bottom ‘prong’ from the gap in the lower trim and bending it back slightly, then pivoting the adapter around the top ‘prong’ before it pulls away from the trim. Do this as carefully as possible to avoid galling the leather!
Materials:• ASA plastic for stiffness, strength, and resistance to both extreme heat and UV degradation
Lead Time & Shipping:• Up to 7 days for processing, printing, and shipping• Domestic shipping in the USA via USPS Ground Advantage• International buyers are responsible for all shipping, customs, and import fees
Returns:• Must be initiated within 30 days of receipt for UNUSED and UNDAMAGED parts only
Thanks so much for your interest! Feel free to message me with any comments, questions, or response and I will get back to you as soon as possible!